Creating a Student List in Navigate
What: Student Lists are static lists of students by student ID.
Where: Student Lists are used throughout Navigate. This includes user profiles of staff or faculty who have created a Student List; the List and Searches page; in Advanced Search and Report filters.
Who: Student Lists are for student success staff and faculty who work to support student success efforts. They can also be useful tools to track information about a group of students.
Conditions: Student Lists are used in Strategic Care for faculty and staff to track lists of students for outreach. They also serve an important role within the Intelligence module, where they can be used to pull reports on a key population of students or track their outcomes over time. A Student List is a static list of students by student ID. You can use Student Lists in a variety of ways, from maintaining a list of students to tracking and sending messages, and alerts. Student lists can also be used to generate an appointment campaign directly from the Student List. The student list can be created with data from within Navigate or a file upload (CSV).
Creating a Student List
There are several ways to create a Student List or add students to a Student List.
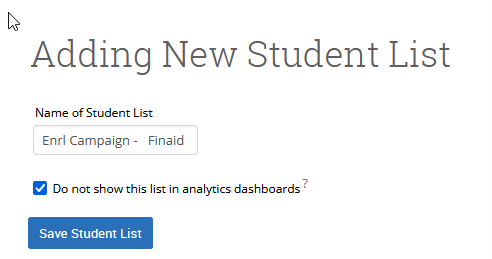
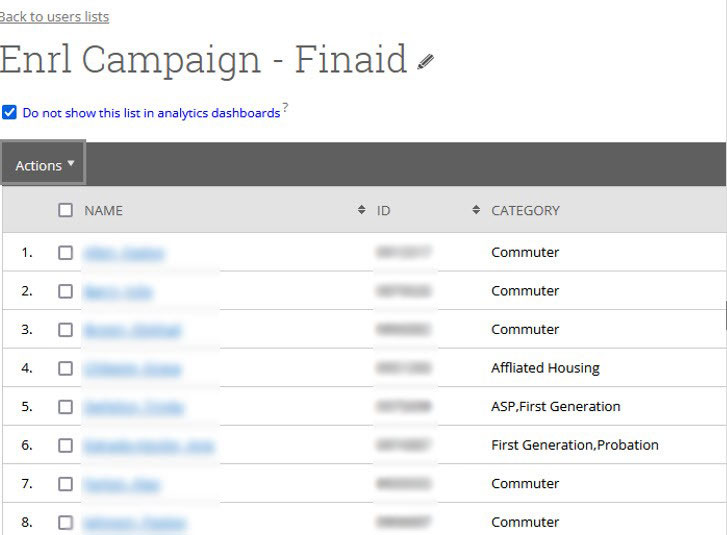
Note. Because some tools in the platform display all Student Lists in filters, please use a standard naming convention for your Student Lists that explains the purpose of the list (e.g., Enrl Campaign-Finaid, F22 Senior His Maj, F22 Transfer 1st Gen).
Option 1. Create a Student List or add students through Advanced Search
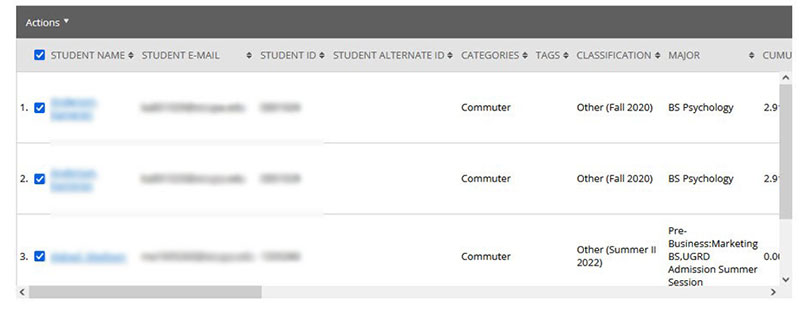
Open Advanced Search, by clicking on the magnifying glass icon on your left navigation and setting your search filters.
Remember: Check off the My Students Only checkbox near the Search button, if you only want to see your assigned students related to the advanced search. Otherwise, to see ALL Students, leave it unchecked. Then click Search.
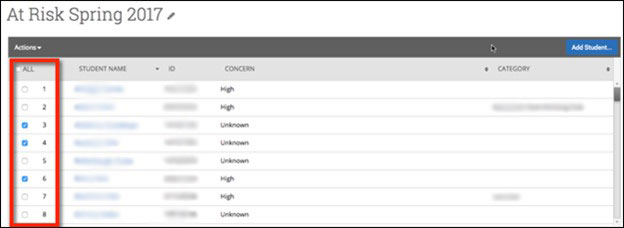
When the list of student results appears, select all students you want to add to your Student List by checking the box in front of their names.
You can select the entire list by clicking the All option. Note that if you decide to perform this action on only certain students from the list, you are limited to selecting from those students within the results page you are currently viewing, up to a maximum of 100.

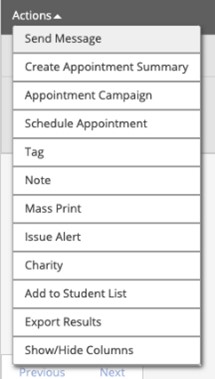
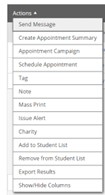
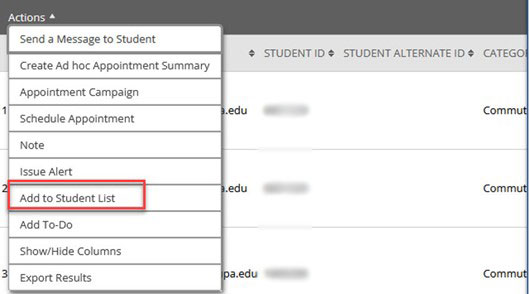
After selecting your students or checking off the checkbox next to Name on the top header-to select all names, open the Actions menu. From here, follow these steps:
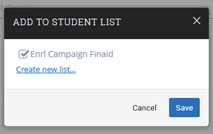
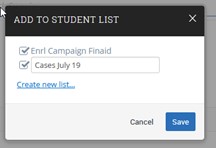
- Select Add to Student List.
- Add students to an existing list OR create a new list.
- After naming your list (if applicable), click Save.
You have a static list of students that will not change over time.
When adding multiple students to a list, platform notations will indicate if all, some, or none of the selected students are already part of a current student list.
- If none of the students selected are on a student list, the student list check box will be empty, such as the "Freshman" student list example in the screen shot.
- If some of the students selected are on a student list, the student list check box will have a dash "-" to indicate that some, but not all, of the students are already included on that list. The example in the screenshot is the "Student List 2."
- If all of the students selected are on a student list, the student list check box will have a checkmark, such as the example "Student List 1" in the screenshot.
You can click on any of these checkboxes to clear these indications and select the list as the placement for your selected student list.
Add to Student List
 : Means all selected students are on that list.
 : Means some of the selected students are on that list
(blank square) This means the selected students are not on that list.
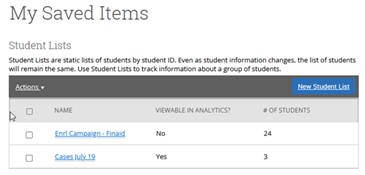
The new list will download to your Saved Searches and Student List section in Navigate.
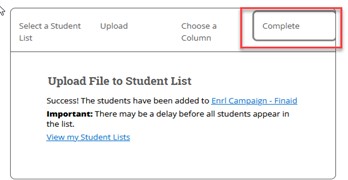
Option 2. Upload a Student List from a list of Student IDs
You can upload a list of students from a CSV file into Navigate to create Student Lists, too.
Warning. The file must be a CSV file
To upload a student list from a CSV file, do the following steps:
- Open the Lists and Search page in Navigate Staff.
- Select Upload Student List from the Actions menu in the Student Lists section of the
page as shown in the following image.
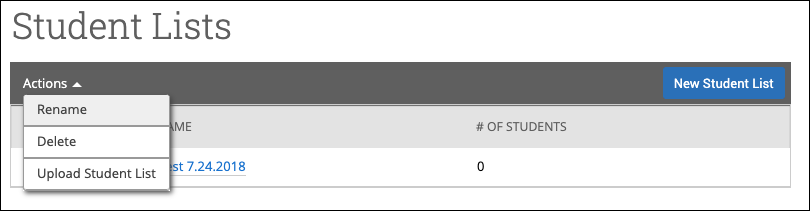
Upload Student List in Actions Menu - Add students to an existing list OR create a new list.
- Select the CSV file and click Upload.
- Choose the column in your CSV file that represents Student ID and then finish importing the file.
Warning. The column containing student IDs in the CSV must be wide enough to display the entire student ID or the platform cannot read it.
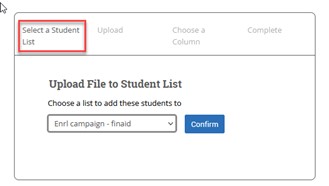
Select your list and click Confirm

Browse and locate the file you want to upload. Click to upload the file.
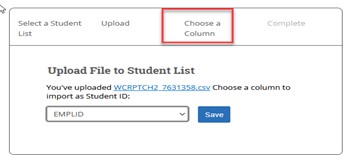
Choose the student ID column, click save.
Option 3. Add Students to Student List from Student Profile
While viewing a student profile, you can add this student to any of your student list. Select Add to Student List in the Actions panel on the right side of a student profile as shown in the following image.
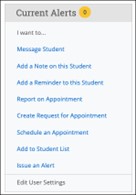
Choose which Student List or Lists to add the student to or create a new Student List and add the student to it. You can review results in the List and Saved Items> Student List.
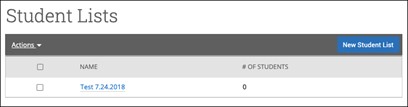
Lists and Searches Page

Saved Searches and Student Lists have their own page called List and Saved Items
Access your Saved Searches and Student Lists on this page or upload new lists.
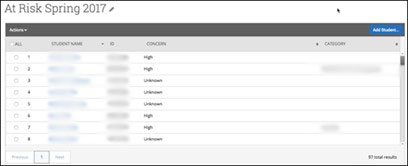
Open any Student List by clicking its name on the Student Lists panel.
After opening a Student List, you can modify, delete, or save a different version of the Student List.
Option 5: Using the Actions Menu with Student Lists
The Actions menu for a Student List is a valuable tool with several options. To open the Actions menu, take the following steps:
- Open a Student List via the 'Lists & Saved Items' tab.
- Select the boxes next to the students you want to take action on.
- Open the Actions menu and select one of the items. The actions are described below.
If you need to add additional students, use the ADD STUDENT button.
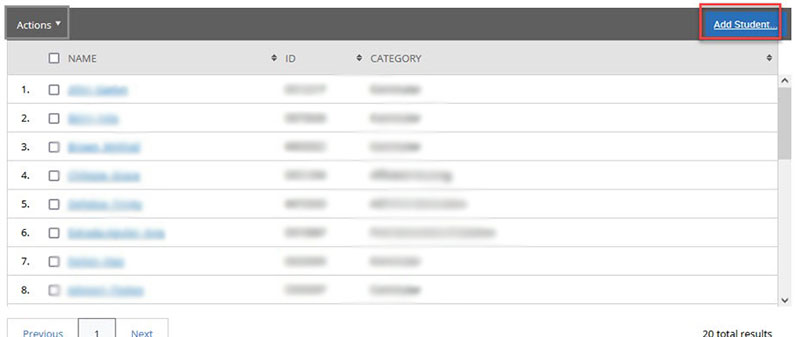
You can add one or multiple students to the list by searching for their names, then click the Add Student button.

Option 4: Creating a student list from a Report
Output from a report or advance search can be save to a list
- From the report (or search) select the students to be on the list
- The list can be new or added to an existing list