
Using the Personal Availability Links
Overview
The Personal Availability Link (PAL) is useful to aid students who are assigned to you in scheduling appointments. Each PAL link is unique to the faculty/staff and will not change. Faculty and Staff can include the PAL link in communications to their assigned student via emails, text messages, and appointment campaigns. The benefit to the student is the student will be directed to the Navigate appointment page to set up the appointment.
Students who are not assigned to you will not be able to access your Navigate schedule through the PAL.
** Please note: Students need to be matriculated to access and use Navigate
Options in Setting Availability
Before a PAL can be utilized, availability will need to be set up. For best results and to avoid scheduling issues, sync your outlook calendar with Navigate (see this link).
You can set up multiple availabilities and segment your time by care unit, service, meeting type, and type of appointment.
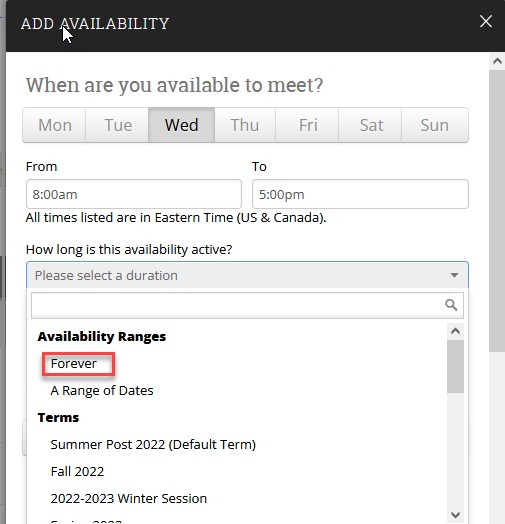
Available Days, Time, and Ranges
- When selecting days for availability, you can select all or just days of your availability for certain appointments. For example, if you are available for Drop-in appointments on Wednesday, just select Wednesday.
- We recommend you use a broad range for the time period, if you have other meetings, Navigate will know and not allow scheduling during those times.
- Since your availability can always be updated, it is recommended that you use Forever
for how long your availability is active.
Type of appointment
There are three appointment types, these can be combined in one or multiple availabilities
Appointment: Students can schedule an appointment via the “Get Assistance” button on their dashboard.
Drop-in: Blocks of time that are ‘open’ office hours
Campaign: Will be required for appointment campaigns, when using an appointment campaign, the
student will be sent a link to the scheduling page for a campaign appointment type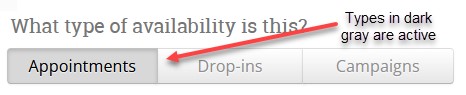
Meeting Types
There are currently three types of meeting types available, this is a multiple selections
- Virtual
- In-Person
- Phone

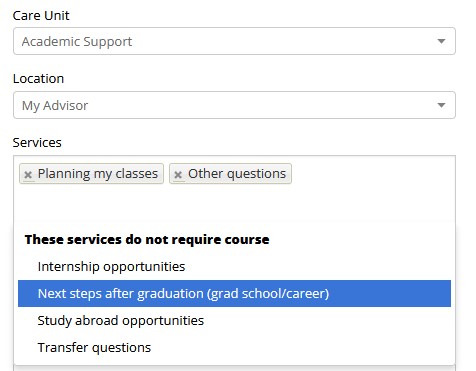
Care Unit/Location/Services
The care unit and location are not multiple selection, so if you are a member of multiple cure units you with need to setup a different availability. Services are multiple selection; this enables you to have different availability based on service
Personal Availability Link (PAL)
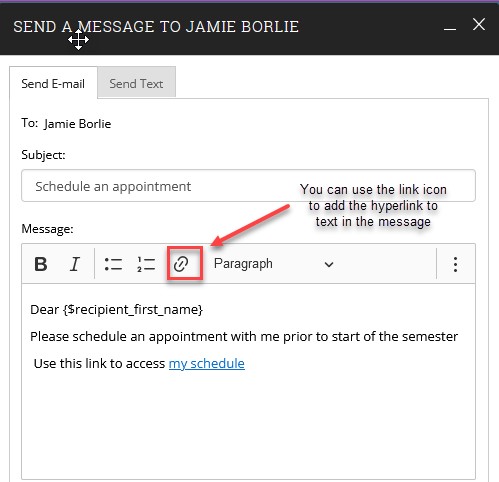
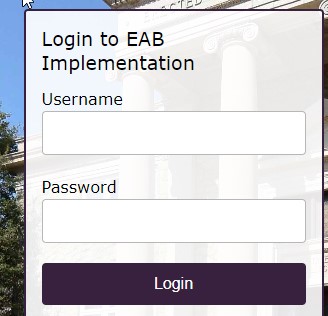
When you include a PAL in a URL field, website, email, or SMS and students click the link, they are taken to the New Appointment page in student schedules. The link redirects to the scheduling page in the student’s browser and asks if they want to continue in the browser or open Navigate Student app (mobile).
Student Experience
Students need to be matriculated to access and use Navigate
When does a student need to login into navigate via browser or mobile app?
- If the link is used in an email outside Navigate the student will be prompted to log into Navigate. For example, if the link is in your email signature, the student would first get the Navigate login page, but then be directed to the appointment page.
- On a mobile device the student will be prompted to download the app or open the app if already downloaded
- If this is the first time the student is downloading the Navigate app, they will be required to answer four brief questions before proceeding to the appointment page
- If the student is on a laptop, the student will be re-directed to the browser page to login
How is an appointment campaign differing from using PAL?
- In an appointment campaign the link in the email is personalized for the student so no login is required.
- Campaigns can be targeted for a specific care unit/service
- Set an appointment length that differs from the current default. The appointment length set in the campaign applies to a student in the campaign.
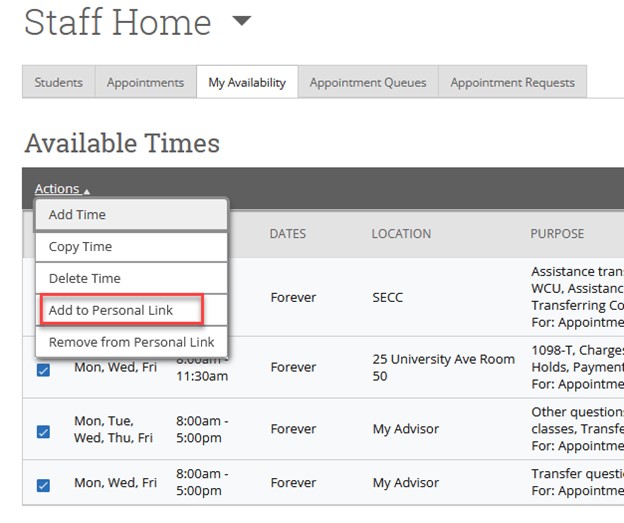
How to setup in Navigate

- On the My Availability tab
- Check the availability to be included in PAL
- Actions menu, select – Add to Personal Link
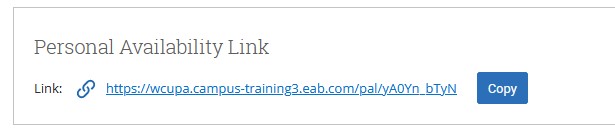
Copying PAL
On the My Availability tab, there is a copy button to copy your unique link to your availability
Using PAL with your assigned students
Sending a Message to a student
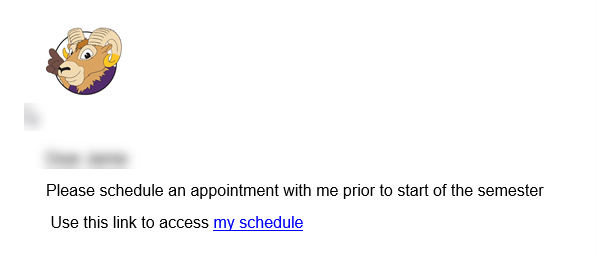
Clicking on the link, take the student to Navigate
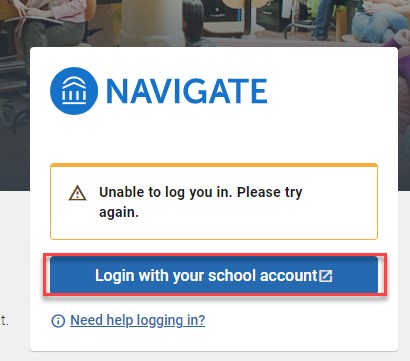
Click on Login with your school account
FAQs
A student is trying to schedule an appointment, but no care unit is available
Review your availability and make sure there is time for the Availability type (Appointment) the care unit and service